Tuesday, June 8, 2010

Meet Sassy Clay Creations


I would like to show some of the lovely things made by Dori of Http://SassyClayCreations.artfire.com .
I really like pretty things that are useful like this candle holder. I would love to have this as part of my Fall decor.

When I saw this mask in Dori's shop I fell in love with it. I love the whimsical style of it.

I love the texture in this Star and moon pin she made. I think it would make a great piece to add to any jewelry collection.

Not only is Dori a talented lady she is a sweetheart who has organized the Friendship round Robin swap box for our Artfire Polymer Clay Smooshers Guild .

So if you are looking for a unique gift for someone or a special treat for your self I recommend checking out her shop http://SassyClayCreations.artfire.com

Thursday, June 3, 2010

Featuring Colt Pixy


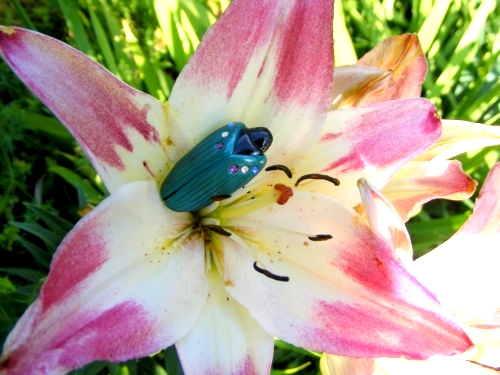
This beautiful Beetle is handmade with polymer clay by the talented artist Star Edwards of http://Coltpixy.artfire.com . She made it for the resent "Bug Challenge" held by the Polymer Clay Smooshers Guild of Artfire.

Above also is the whimsical piece she did for the "flight" challenge

If you like miniatures you will love the beautiful tiny baskets she weaves with polymer clay take a peek at her Artfire shop you'll be glad you did.

Not only is she a wonderful artist she is also the tireless guild master of the Smooshers guild who spends a great amount of time and energy promoting her fellow guild members.

Tuesday, May 25, 2010

Do you want to see how I made it?


Don't you just love these colors together? I do.
I had this beautiful Dicro cabochon in my stash for a couple of years waiting for the right design to use it.

I thought it would be fun to do kind of a step by step of how I made these beads into the pretty necklace at the end of this post.

I mounted the cab onto a square of stiff interfacing and stitched a peyote bezel around it with Dark blue size 10 Delica beads. I like using delicas because of their uniform size and large holes.

After I stitched the bezel I trimmed the interfacing and glued the unit to some soft ultra suede to hide the ulgly stitches and make a nice finished back for the pendant.

The next step is to join the front and back together and finish the edge with pretty picots.

When I finished the edgings and embellishments I added a Swarovski crystal link and used it for the pendant bail.

Here is the necklace being made. This stitch makes the necklace look like a spiral staircase of pretty bugle beads

This is how the back looks totally finished. See how neat and tidy it looks.

Here is the front finished, isn't it pretty.

This is a close up of the finished necklace. I named it Tranquil Waters because I think the glass cab looks like a pool of water with gentle ripples.

Tada here is the finished necklace I wish the camera could capture how pretty the pendant is but trust me it is lovely in real life.
I hope you enjoyed seeing how this necklace was made and maybe you are a little inspired to try a little beading yourself.

Monday, April 19, 2010

How to make a cuff bracelet part 2


So I finished doing all the stitching on the front of the bracelet and I think it looks cute so far now it's time to put it all together.
I sandwiched the front ,brass cuff form and suede backing together then I stitched them all together with a picot edging stitch.

So here is a top view of finished cuff

side view

close up side view

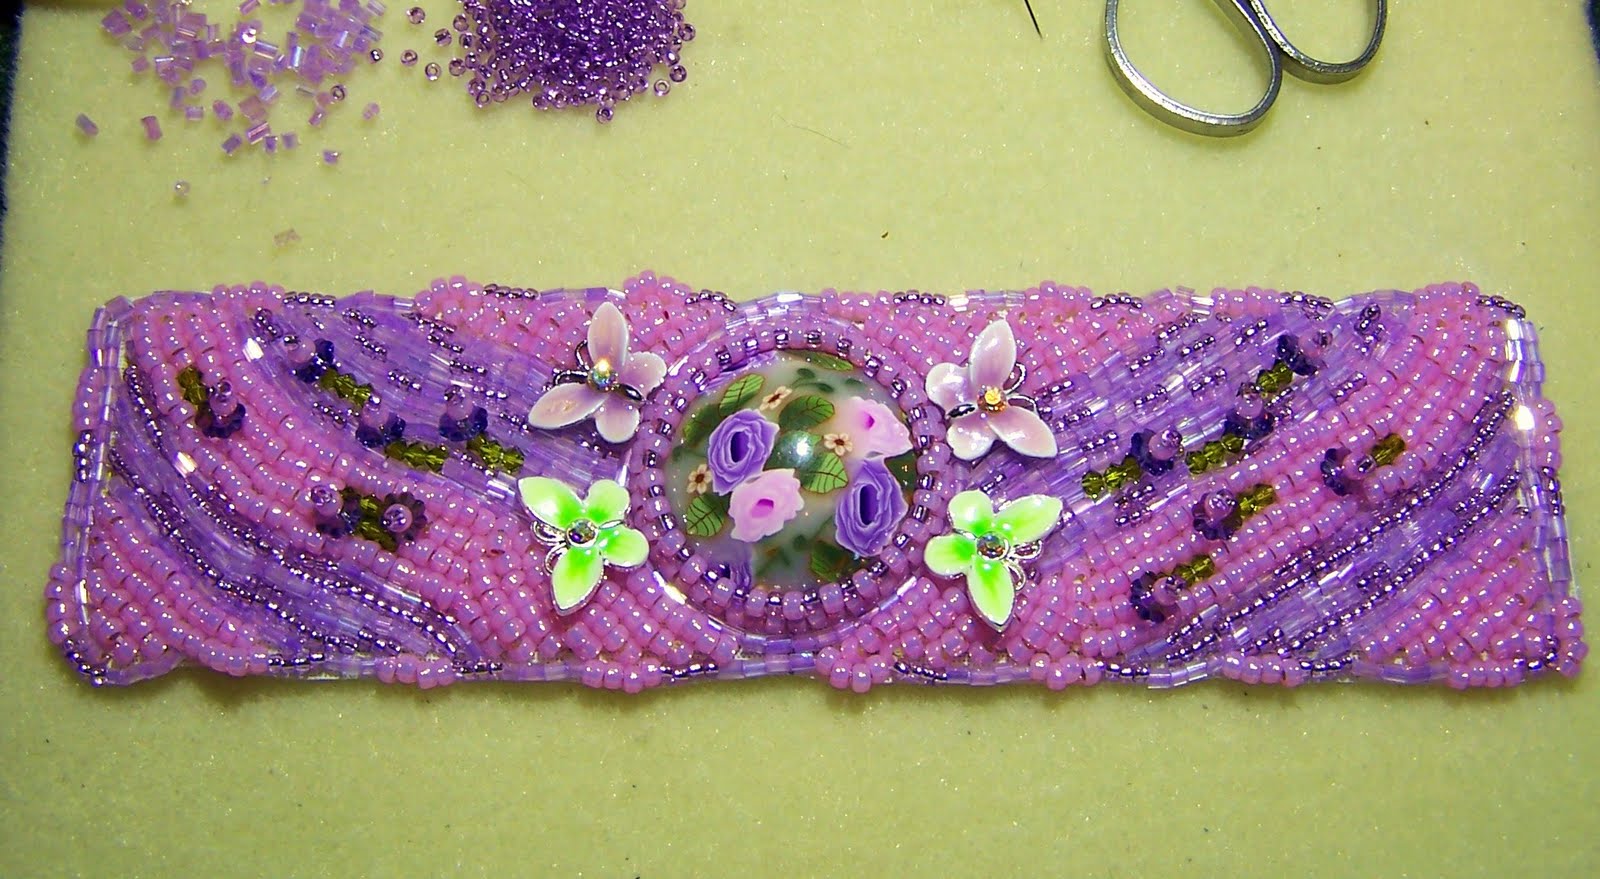
and here is the glamor shot of the finished bracelet cuff. It measures 2 inches wide and is about 7 1/4 inches long it can be adjusted to fit most wrist sizes even my fat little wrist.
The center cabochon is polymer clay,the butterflies are enameled with Swarovski crystals. The rest of the beads are Japanese seed beads and Swarovski crystals. the sparkle is awesome to bad that doesn't show up well in photos.

Over all I am happy with the end result of course like any other "artist" I see lots of thing I would do differently.

So there ya go this is my entry for The Polymer Clay Smooshers flight theme challenge........What do you think?

Sunday, April 11, 2010

How to make a cuff bracelet


I wanted to do a work in progress post for anyone interested in making a cuff bracelet or just wondered how they were made. I thought I'd show how I made one.

I am not a great planner when I make something; I am more of a design as I go kind of Gal.

Making the cabochon is my first step because everything is designed around it. I made this garden Cabochon with polymer clay and mounted it in the center of a strip of stiff interfacing that measures about 2 1/2 x 8 1/2 inches. While the glue dried I picked out the beads I wanted to use to stitch the bezel. Then I stitched the bezel using a peyote Stitch.


I began to embellish the cuff band with some cool accent beads I had in my bead stash. This bracelet is for The Polymer Clay Smooshers "Flight" challenge so I thought the Swarovski crystal and enamel butterflies would be perfect for that theme.


I wanted to use the beads to show motion and start to create some flow...


I started to add some green crystals and crystal flower beads to bring in the flowers from the cabochon. It's a bummer that the crystal flowers don't show well in these photos I'll make sure they show better in finished piece photos.

As I'm working I like to lay it over the brass form to make sure it's flowing and laying in a visually pleasing way. So far I am liking how it's looking .

Now I need to spend some more time finishing this side of the cuff and then start on the other side. As I do I will take more photos and post them along with the finished piece for you.

I am looking forward to entering the piece along with all of my other guild mates project in Polymer Clay Smooshers Guild "Flight" challenge. You can check out our guild blog at http://polymerclaysmooshers.blogspot.com for lots of great polymer clay information and inspiration.

Monday, April 5, 2010

My 2 Pride and Joys

These beautiful little ones are my Son Aaron's babies. They are one of the reasons I wake up each day happy to be alive. Before they were born I couldn't imagine how wonderful being a Grandma could be.

My little buddy Brenden will be 4 in July. He is smart,sometimes a little to smart. He's creative, he likes to craft, color and build things and he has a wicked sense of humor. Best of all he is loving and spends a lot of time cuddling with Granny.

He reminds me so much of his Daddy when he was my sweet little boy, they are a lot alike.
My little beauty Lexiepoo is so much fun. She's funny, independent,fearless and frisky. She loves her big brother she also loves to aggravate him. Watching her grow is going to be interesting....
So Dear Readers thank you for indulging me with my Grandma pride and letting me share my 2 little love monkeys with you.......

Sunday, April 4, 2010

Buttons, buttons and more buttons


I use to sew a lot and I always thought buttons were the finishing touch to the project. I would search high and low for just the right buttons. I don't have to do that anymore; if I want a button I make it.

I made the cute little buttons you see with polymer clay. Each one is hand formed,sanded and buffed to a glassy sheen. they measure 15mm and are the perfect size for a blouse/shirt,scrapbooking or maybe to embellish a quilt.

I made a bunch of each for me and some to put into my Etsy and Artfire shops for others to use on their projects.

My favorites are the pinstriped ones and the gold retro patterned ones.


Today Is Easter Sunday and I am having a sale in my http://Gingerbells.ArtFire.com shop
FREE SHIPPING! on all jewelry
and
Buy 3 Get 1 FREE on all handcrafted soap bars.

Sale ends at Midnight....

Happy Easter to all !!!!!